


Gatsby Blog Theme 제작기 2
이전 사용 Gatsby Theme인 Blorderless Theme 참고를 많이 했다.
버전이 달라서 GraphQL query부분만 조금 애먹었는데 이런 부분은 공식문서 보고 처리
1. Project Setting
- 시작 전 node 18.16.1 버전을 받고 nvm을 사용해 지정해 주고 gatsby version 확인 후 최신 버전으로 설치
$ nvm install 18.16.1

$ nvm use 18.16.1

$ gatsby --version

$ npm i -g gatsby-cli
node : 18.16.1
gatsby : 5.11.0
그 후 gatsby 프로젝트 생성
gatsby new
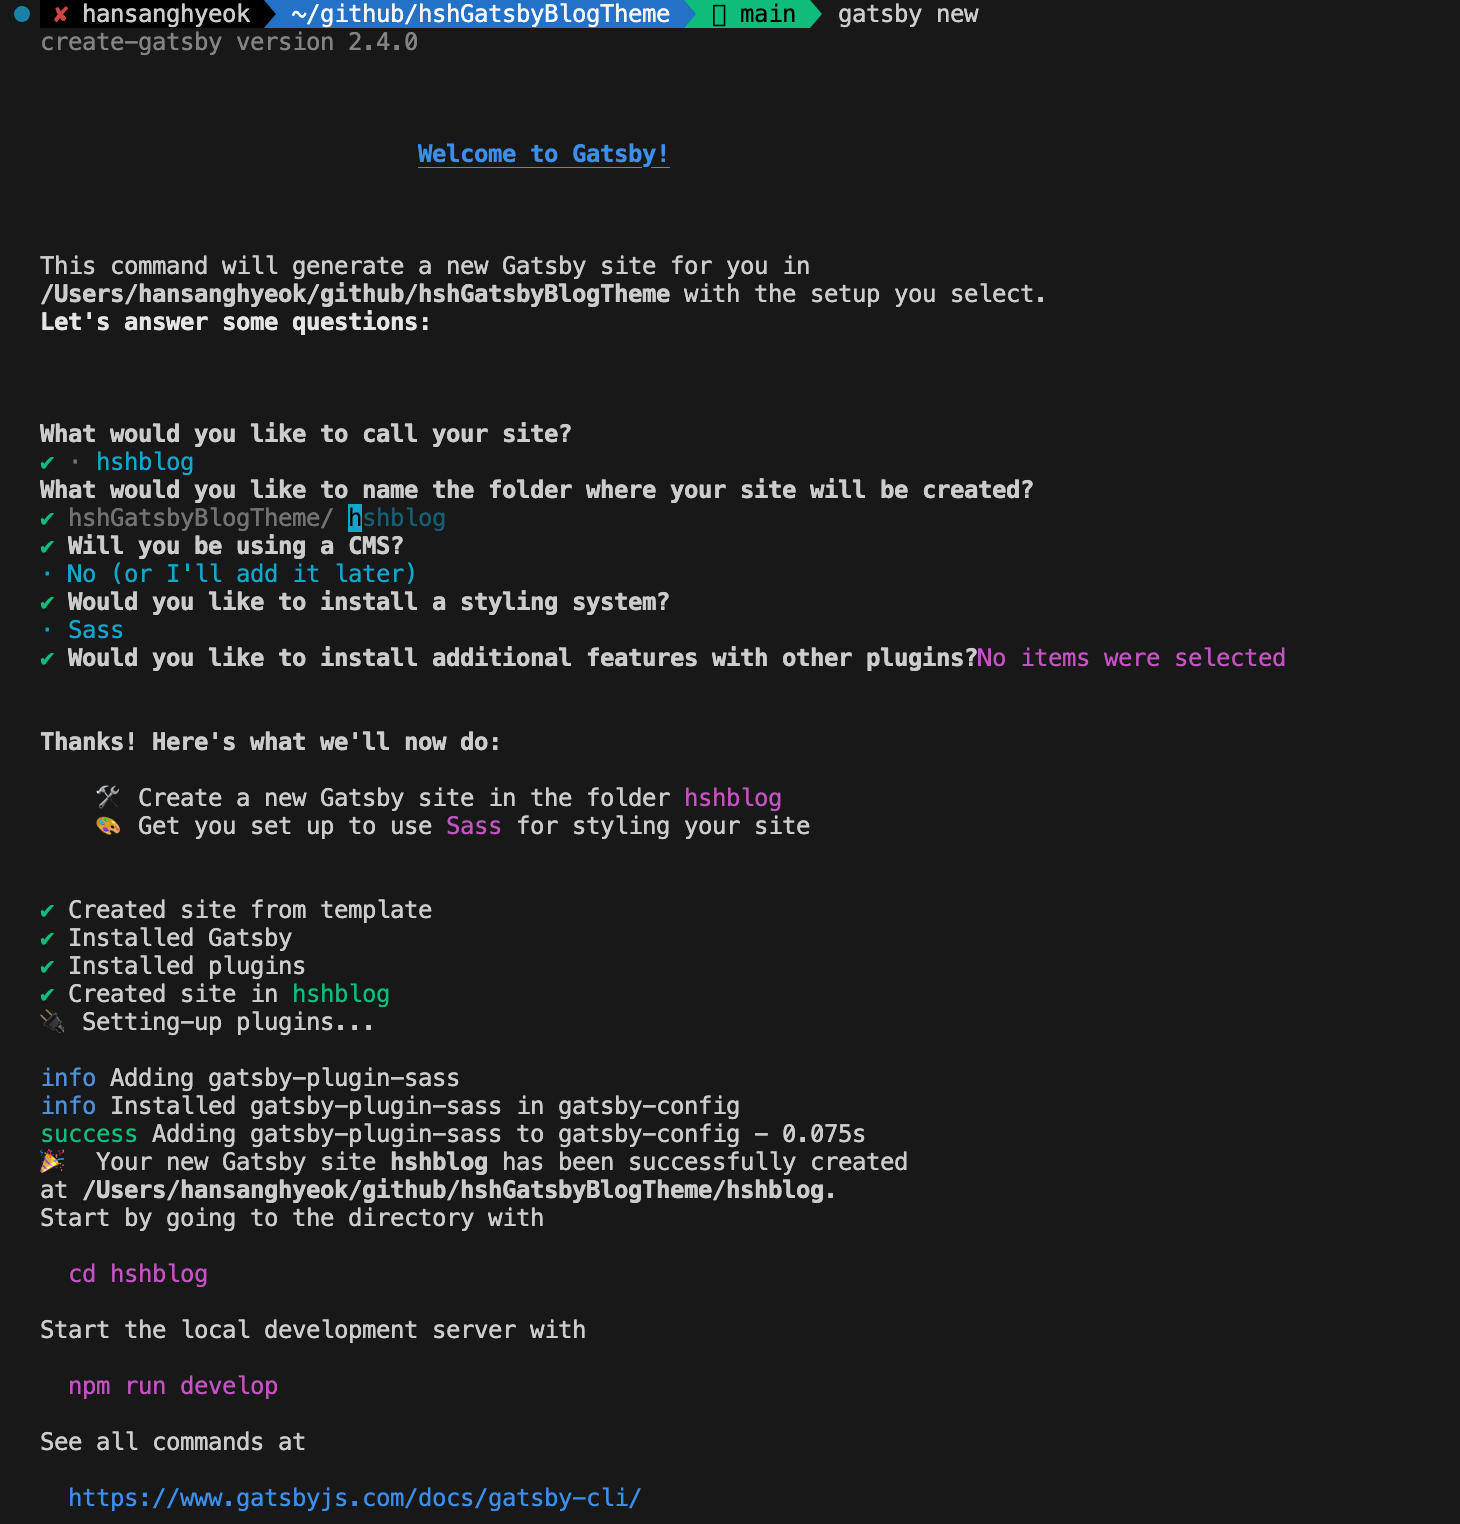
- css는 scss로 적용
- cms 사용과 plugin부분은 추후에 작업할꺼라 추가하지 않았다.
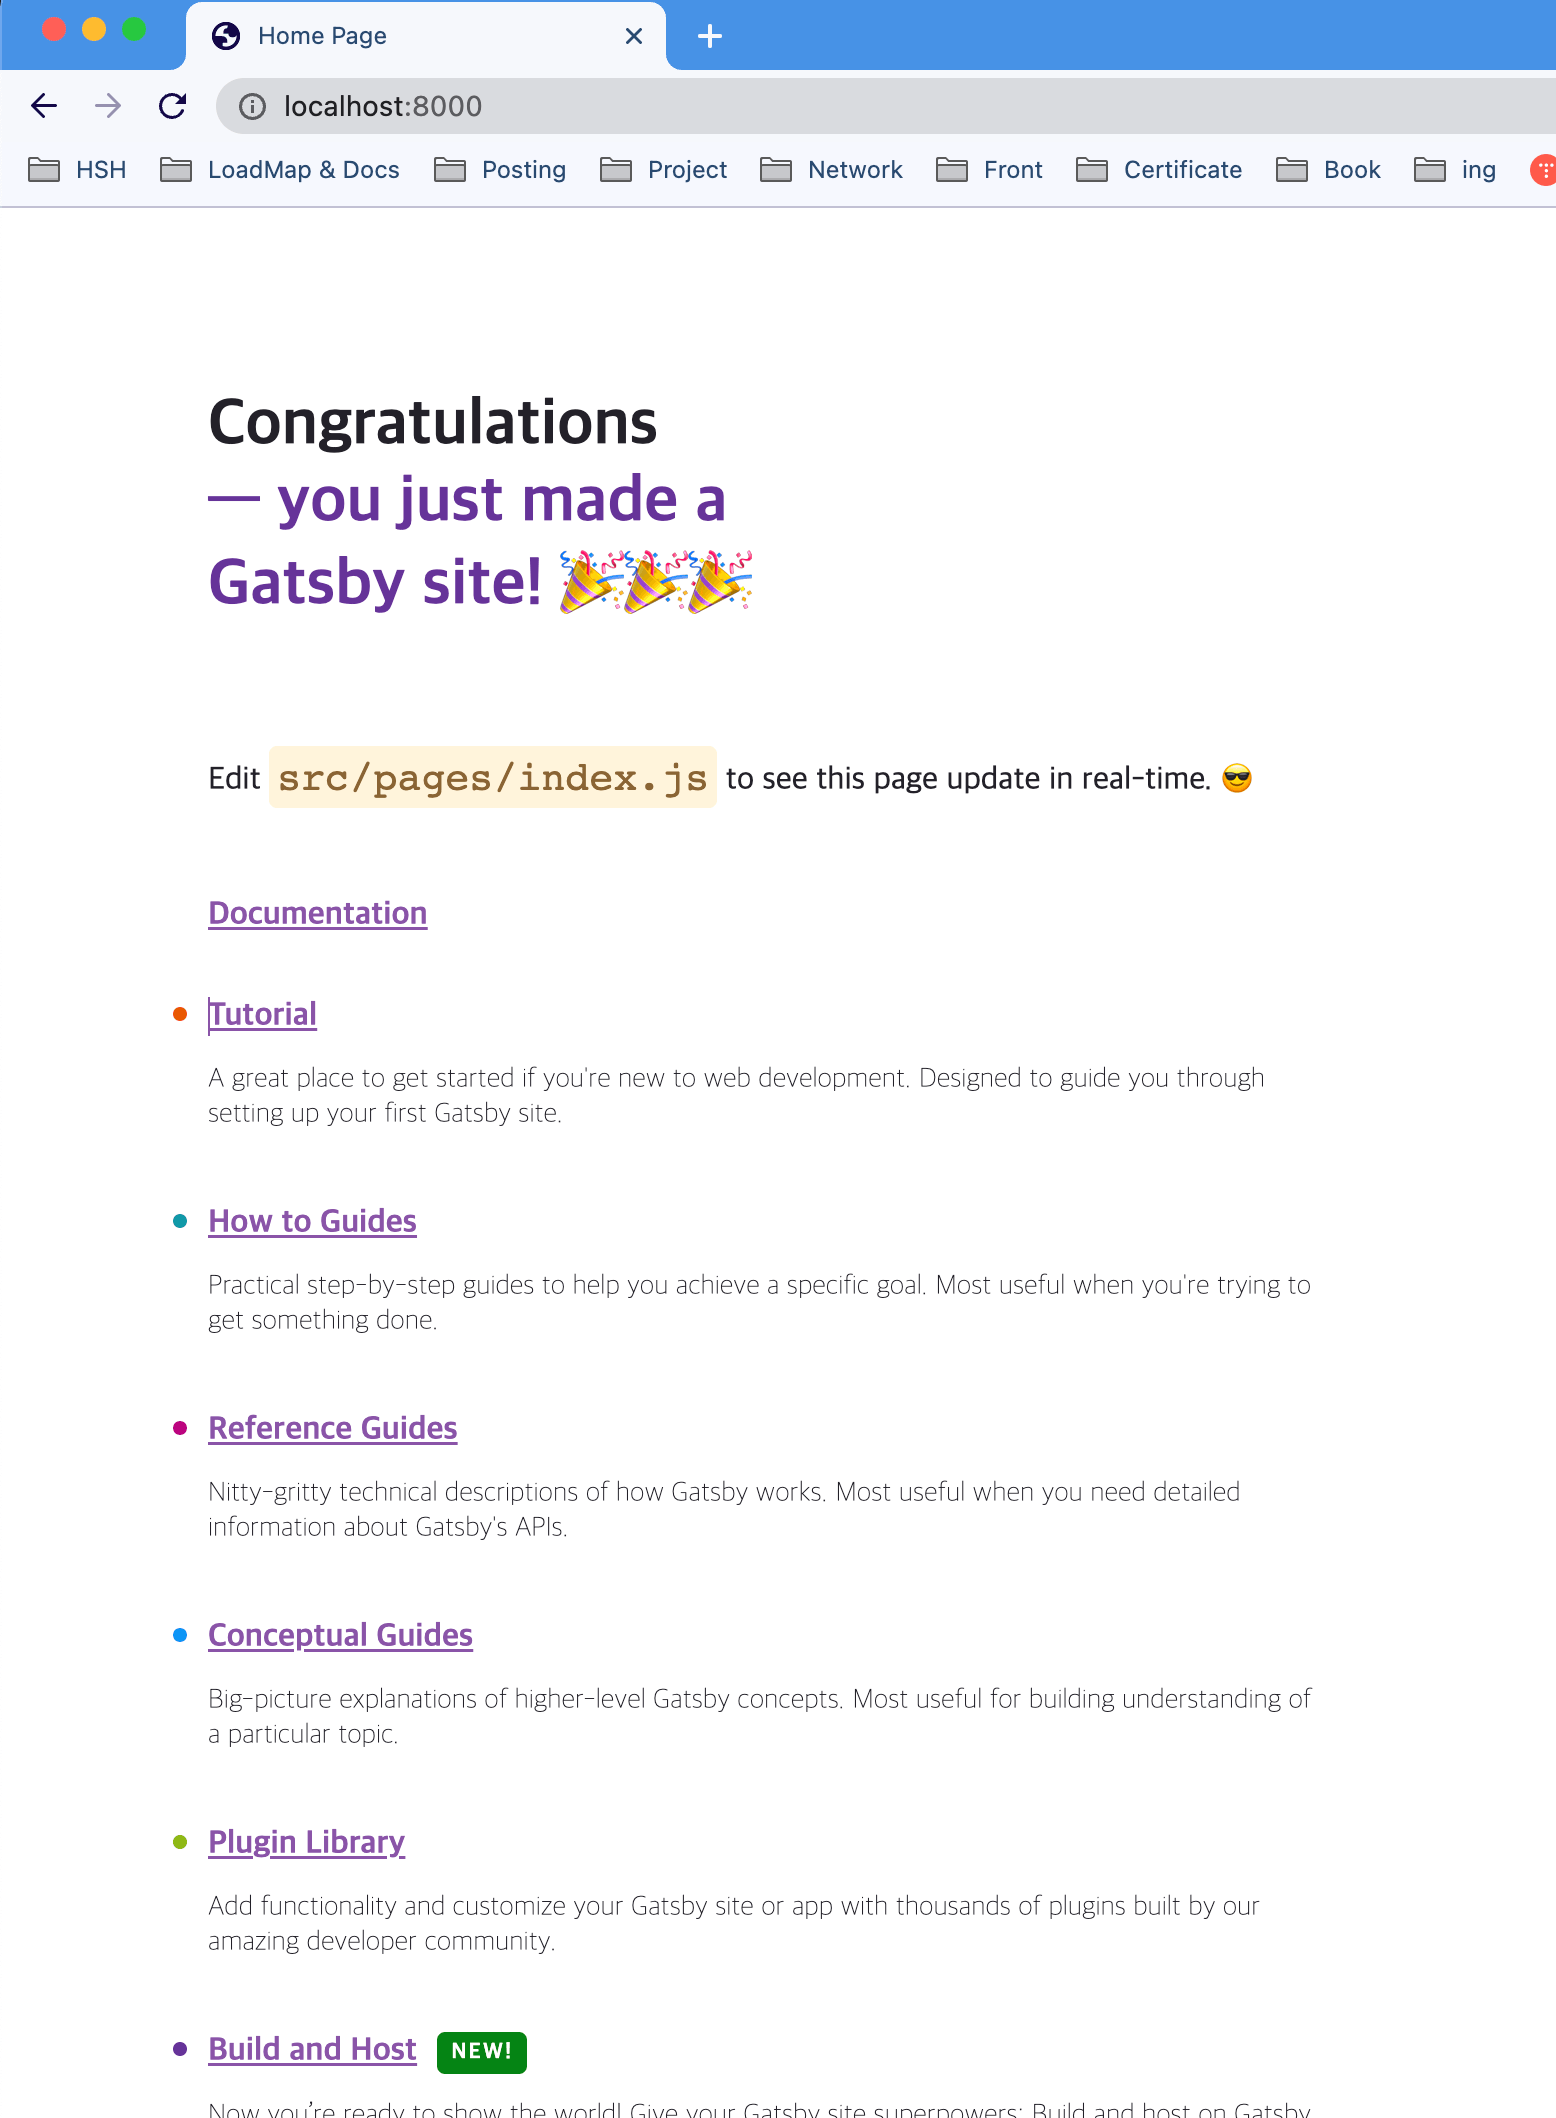
작업을 성공적으로 마쳤으면 아래와 같은 페이지를 확인할 수 있다.
$ cd hshblog

$ npm run dev
1.1 Typescript Config
그럼 다음 과정으로 Typescript적용을 위해 설정을 추가해보자
$ npm install typescript추가로 플러그인을 추가하고 config 설정을 추가해 주었다.
(gatsby-plugin-typescript : typescript사용 플러그인)
그리고 난 후 tsconfig.json파일을 생성해 설정 추가
tsconfig.json
{
  "compilerOptions": {
    "target": "es5",
    "module": "commonjs",
    "allowJs": true,
    "jsx": "preserve",
    "strict": true,
    "noUnusedLocals": true,
    "noUnusedParameters": true,
    "noImplicitReturns": true,
    "baseUrl": "./src",
    "paths": {
      "components/*": ["./components/*"],
      "utils/*": ["./utils/*"],
      "hooks/*": ["./hooks/*"]
    },
    "esModuleInterop": true,
    "skipLibCheck": true,
    "forceConsistentCasingInFileNames": true,
    "resolveJsonModule": true
  },
  "include": ["src/**/*.tsx", ".eslintrc.json"],
  "exclude": ["node_modules"]
}
paths옵션은 절대 경로를 사용하기 위해 경로 매핑 옵션
-> 깔끔한 코드 작성가능
-> baseurl을 작성해줘야 한다
-> baseUrl을 src로 설정했기 때문에 이를 기반으로 경로 작성
실제로 paths 적용하기 위해선 gatsby-node.js파일에 webpack config를 추가해야함
/**
 * Implement Gatsby's Node APIs in this file.
 *
 * See: <https://www.gatsbyjs.com/docs/node-apis/>
 */

// You can delete this file if you're not using it

const path = require('path')

// Setup Import Alias
exports.onCreateWebpackConfig = ({ getConfig, actions }) => {
  const output = getConfig().output || {}

  actions.setWebpackConfig({
    output,
    resolve: {
      alias: {
        components: path.resolve(__dirname, 'src/components'),
        utils: path.resolve(__dirname, 'src/utils'),
        hooks: path.resolve(__dirname, 'src/hooks'),
      },
    },
  })
}
alias부분에 components로 시작하는 경로는 모두 src 폴더 내의 components 폴더로 매핑해주어 절대 경로를 사용 설정
1.2 ESLint, Prettier
ESLint : 코드 분석을 통해 문법 오류 또는 코드 규칙에 어긋나는 부분을 찾아주는 정적 코드 분석 도구
Prettier : 개발자가 작성한 코드를 정해진 규칙에 따르도록 변환해주는 Code Formatter
.eslintrc.json
{
  "env": {
    "browser": true,
    "es2021": true
  },
  "extends": [
    "eslint:recommended",
    "plugin:@typescript-eslint/eslint-recommended",
    "plugin:@typescript-eslint/recommended",
    "plugin:@typescript-eslint/recommended-requiring-type-checking",
    "plugin:prettier/recommended"
  ],
  "parser": "@typescript-eslint/parser",
  "parserOptions": {
    "ecmaFeatures": {
      "jsx": true
    },
    "ecmaVersion": 12,
    "sourceType": "module",
    "project": "./tsconfig.json"
  },
  "plugins": ["react", "@typescript-eslint"],
  "ignorePatterns": ["dist/", "node_modules/"],
  "rules": {}
}
.eslintrc.json 파일의 parserOptions.project 프로퍼티 값에 의해
루트 디렉토리의 자바스크립트 파일에서 TypeScript Parser 관련된 오류가 발생할 수 있다.
해결하기 위해 .eslintignore 파일 추가
.eslintignore
gatsby-browser.js
gatsby-config.js
gatsby-node.js
gatsby-ssr.js
.prettierrc
{
  "printWidth": 80,
  "tabWidth": 2,
  "useTabs": false,
  "semi": false,
  "singleQuote": true,
  "quoteProps": "as-needed",
  "trailingComma": "all",
  "bracketSpacing": true,
  "arrowParens": "avoid",
  "endOfLine": "lf"
}
1.3 import문에 빨간 줄 표시 나는 경우
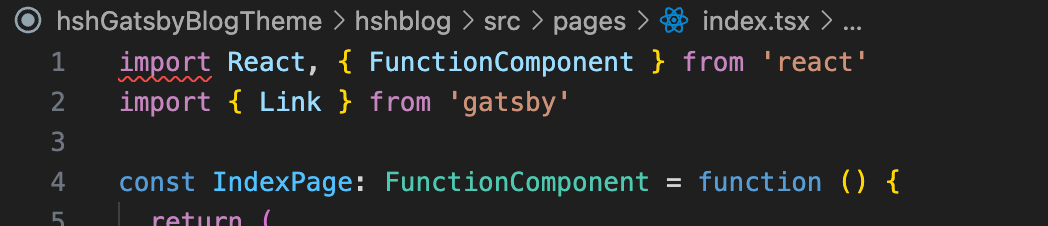
이렇게 import문에 빨간줄이 표시되는 경우가 있는데
추가적으로 tsconfig.json과 eslintrc.json파일을 수정해야 한다.
.eslintrc.json에 "project": ["./tsconfig.eslint.json", "./tsconfig.json"] 을 추가하고
.tsconfig.json에 "include": ["src/**/*.tsx", ".eslintrc.json"] 로 변경한다.
2. Project structure
기본적인 환경설정은 마무리 했고 프로젝트 디렉토리를 구성한다.
root
├─  .cache  : Gatsby가 자동으로 생성한 내부 캐시 (자동으로 생성)
├─  public  : 빌드 된 결과 (자동으로 생성)
├─  src
│    ├─ component : Components 디렉토리
│    │       ├─ Common
│    │       ├─ Layout
│    │       ├─ Post
│    │       ├─ Main
│    │       └─ Search
│    └─ hooks     : Custom hooks 디레곹리
│    ├─ pages     : 페이지 역할 디렉토리
│    ├─ templates : post page 관련 파일
│    ├─ graphql   : GraphQL 관련 쿼리
│    ├─ types     : typescript type관련
│    ├─ styles    : markdown 관련 style
│    └─ assets    : 정적인 컨텐츠 (webpack 적용 o)
├─  static : 정적인 컨텐츠 (webpack 적용 x)
│      ├─ icons  : icon 폴더
│      ├─ images : image 폴더
│      └─ fonts  : font 폴더
├─  gatsby-browser.js : browser 관련 API 설정 및 구현
├─  gatsby-config.js  : Gatsby 사이트 기본 config 파일 (meta data 설정, gatsby-plugin 설정)
├─  gatsby-node.js    : 사이트 실행 시 한번 실행되는데 사이트 구축에 필요한 부분 구현
├─  gatsby-ssr.js     : 서버측 렌더링 API가 있는 경우 설정 정의
└─  _config.js        : metadata, plugin 활용 시 필요한 설정 값 저장 (편하게 관리하기 위한 용도)
page는 총 3개 페이지를 제작 한다.
404.tsx
index.tsx
post.tsx (templates)
추가로 templates디렉토리를 설명하면
게시글 페이지와 같이 페이지의 역할을 하면서 같은 형식의 여러 콘텐츠를 보여주는 컴포넌트를 저장하기 위한 디렉토리이다. (pages 디렉토리와는 다르게 파일명으로 페이지에 접근이 불가능)
3. Page work
페이지 작업과 사용한 API를 간략하게 정리한다.
Gatsby에서는 기본적으로 pages 폴더 내부의 파일과 Gatsby API를 통해 생성해주는 페이지의 템플릿 파일에서만 Query 정의가 가능하다.
일반적인 컴포넌트에서는 StaticQuery를 사용해 graphql에 데이터 조회
변수에 Query를 담아주고, 이를 Export 해주면 Gatsby 내부적으로 요청을 보내면
요청에 대한 응답으로 데이터를 Props로 전달한다.
Typescript를 사용할 경우 조회 결과를 interface or type으로 생성 해 Page Component에 넣어줘야 한다
3.1 Link API
a태그로 페이지를 이동하게 구현할 수 있지만
gatsby는 페이지 이동을 위한 Link API를 제공한다.
Link API는 Prefetch를 통해 페이지에서 사용할 리소스의 로딩 속도를 높인다.
세부 동작을 간략히 살펴보면
Gatsby는 리소스 로드 속도를 높이기 위해 현재 페이지에서 사용되는 모든 링크를 찾은 후, 각 링크의 페이지를 미리 로드한다.
즉, 메인 페이지의 로딩이 완료되면, Gatsby는 링크를 찾고, 이 페이지를 미리 로드해 로딩 시 필요한 시간을 줄인다.
3.2 How to apply CSS (feat. EmotionJS)
CSS를 적용하기 위해선
CSS Module + CSS Framework(tailwind) 필요시 SASS 함께 사용하는 방법과
CSS-in-JS(styled-component, emotionJS) 두가지 방법으로 많이 쓰이는 것 같다
여기서 나오는 용어를 각각 살펴보자
CSS Module :
tailwind :
SASS : CSS 전처리기로 CSS를 편리하게 사용할 수 있도록 하며 추가 기능이 있는 확장판 언어
CSS-in-JS :
styled-comnponent :
emotionJS :
참고 기술 아티클
웹 컴포넌트 스타일링 관리 : CSS-in-JS vs CSS-in-CSS - SAMSUNG SDS
카카오웹툰은 CSS를 어떻게 작성하고 있을까? - kakao FE 기술블로그
Why We’re Breaking Up with CSS-in-JS - Sam Magura, Dev.to
CSS-in-JS에 비해 유틸리티 CSS를 사용하는 것이 성능상 이점이 있기 때문에
웹 사이트 성능 향상을 위해 CSS Module과 CSS Framework를 선택해 처리하는 방법이 많이 사용 되는 것 같다.
상세한 성능까지 고려하긴 힘들어 코드 작성에 편하고 익숙한 EmotionJS로 진행…하다가…
profile card demo - tailwindtoolbox 요거 때문에 tailwind도 추가했다
작업하다 tailwind to css 변환해주는 사이트를 찾아서 styled component로 바꾸긴 함 ㅋㅋㅋㅋㅋ
세팅은 tailwindcss - docs 보고 설정
추가로 markdown css 적용하는 부분이 많이 어려웠는데
zoomkoding-gatsby-blog markdown 부분 적용했다.
(글자 크기나 codehighlight부분 등 수정은 필요)
결국 styled-component + tailwind + scss 설정 전부함 ㅋㅋ;
3.2.1 How to use EmotionJS
그럼 Tagged Template Literal 방식을 통한 Styled Component 생성은 아래 느낌으로 작성하면 된다.
import React, { FunctionComponent } from 'react'
import { Global, css } from '@emotion/react'
import styled from '@emotion/styled'

const TextStyle = css`
  font-size: 18px;
  font-weight: 700;
  color: gray;
`

// div 요소
const Text1 = styled.div<{ disable: boolean }>`
  font-size: 20px;
  font-weight: 700;
  text-decoration: ${({ disable }) => (disable ? 'line-through' : 'none')};
`

// 이미지 사용 시
const ProfileImageSrc = styled(GatsbyImage)`
  display: none;
  border-radius: 0;
  box-shadow: 0 25px 50px -12px rgba(0, 0, 0, 0.25);

  @media (min-width: 1024px) {
    display: block;
    border-radius: 0.5rem;
    height: 100%;
    margin: auto;
  }
`

// Link 사용 시
const BlogNameLink = styled(Link)`
  display: flex;
  flex-direction: column;
  justify-content: center;
  align-items: center;
  font-size: 5px;
  width: 400px;
  height: 60px;
  margin: auto;

  @media (min-width: 1080px) {
    padding-left: 10%;
  }
  @media (max-width: 800px) {
    width: 200px;
  }
`

const InfoPage: FunctionComponent<InfoPageProps> = function ({
  data: {
    site: {
      siteMetadata: { title, description, author },
    },
  },
}) {
  return (
    <div>
      <Global styles={globalStyle} />
      <div css={TextStyle}>{title}</div>
      <Text1>{description}</Text1>
      {author}
    </div>
  )
}
3.3 Font
폰트는 둥글 둥글한 한글 - Notosans, 영문 - Montserrat를 사용했다. 파일은 용량을 줄이기 위해 woff로 변환
폰트는 Google Fonts 요기서 받으면 된다.
적용은 로컬 글꼴 사용 문서 보고 적용했다.
gatsby-ssr.js에 onRenderBody함수에 적용하고 싶은 6개 폰트 적용 후 전역 style Component에서 설정해주었다.
3.4 Infinite Scoll
인피니트 스크롤은 PostList 노출하는 부분과 Category 노출 하는 부분에 필요하다
IntersectionObserver를 활용해 구현 했다.
4. Markdown Format
markdown.md
title: Gatsby Blog Theme 제작기 2
date: 2023-08-17
update: 2023-08-17
category:
- Gatsby
tags:
- React
- Gatsby
summary:
- Gatsby Blog 구현 (Project structure & Page work)
thumbnail: './thumbnail.png'
keywords:
- Gatsby
작업 후 markdown format 형식이다.
목차 부분 노출하기 위해서 category 부분을 추가로 설정하고
post list에서 연관된 내용 표시하기 위해서 tags 추가했다.
페이지에서 실질적으로 route되는 slug는 Creating Slugs for Pages 문서와 Blorderless Theme를 참고했다.
slug 로직을 요약하면 contents폴더에 markdown폴더/md파일 + 이미지 파일이 저장되어 있는데
slug생성 시 폴더 경로를 삭제하고 markdown이름으로만 route 경로 생성한다
지금은 summary부분과 thumbnail을 지정하게 구현했는데 추후엔 저 부분들을 없애고
gatsby-node.js에서 만들어 줄 예정
4. Plugin
plugin적용한 config파일
/**
 * @type {import('gatsby').GatsbyConfig}
 */
const config = require('./_config')
const { title, description, author, siteUrl, language } = config

module.exports = {
  siteMetadata: { title, description, author, siteUrl, language },
  plugins: [
    {
      resolve: 'gatsby-plugin-typescript',
      options: {
        isTSX: true,
        allExtensions: true,
      },
    },
    `gatsby-plugin-emotion`,
    {
      resolve: `gatsby-plugin-sitemap`,
      options: {
        output: `/sitemap.xml`,
        query: `
          {
          site {
              siteMetadata {
                  siteUrl
              }
          }

          allSitePage {
            edges {
              node {
                path
                context {
                  lastmod
                }
              }
            }
          }
      }`,
        serialize: ({ site, allSitePage }) => {
          return allSitePage.edges.map(edge => {
            return {
              url: site.siteMetadata.siteUrl + edge.node.path,
              changefreq: `daily`,
              lastmod: edge.node.context.lastmod,
              priority: 0.7,
            }
          })
        },
      },
    },
    `gatsby-plugin-react-helmet`,
    {
      resolve: `gatsby-source-filesystem`,
      options: {
        name: `contents`,
        path: `${__dirname}/contents`,
      },
    },
    {
      resolve: `gatsby-source-filesystem`,
      options: {
        name: `static`,
        path: `${__dirname}/static`,
      },
    },
    `gatsby-transformer-sharp`,
    `gatsby-plugin-sharp`,
    {
      resolve: `gatsby-transformer-remark`,
      options: {
        tableOfContents: {
          maxDepth: 3,
        },
        plugins: [
          {
            resolve: 'gatsby-remark-smartypants',
            options: {
              dashes: 'oldschool',
            },
          },
          {
            resolve: 'gatsby-remark-code-headers',
            options: {
              className: 'code-highlight-header',
            },
          },
          {
            resolve: 'gatsby-remark-code-buttons',
            options: {
              // 복사버튼 전체 컨테이너
              buttonContainerClass: `copyButtonContainer`,
              // 버튼 자체
              buttonClass: `copyButtonClass`,
              // 버튼 텍스트
              buttonText: `copyButtonText`,
              // Optional svg icon class name. Defaults to 'gatsby-code-button-icon'.
              // svgIconClass: `customSvgIconClass`,
              // Optional svg icon. Defaults to svg string and can be
              // replaced with any other valid svg. Use custom classes
              // in the svg string and skip `iconClass` option.
              // svgIcon: `customSvgIcon`,
              // Optional tooltip text. Defaults to ''.
              // tooltipText: `customTooltipText`,
              // Optional toaster class name. Defaults to ''.
              toasterClass: `copyButtonToaster`,
              // Optional toaster text class name. Defaults to ''.
              toasterTextClass: `copyButtonToasterText`,
              // alert 텍스트
              toasterText: 'customToasterText',
              // Optional toaster duration. Defaults to 3500.
              // toasterDuration: 5000,
            },
          },
          `gatsby-remark-autolink-headers`,
          {
            resolve: `gatsby-remark-table-of-contents`,
            options: {
              exclude: 'Table of Contents',
              tight: false,
              ordered: false,
              fromHeading: 1,
              toHeading: 2,
              className: 'tableContents',
            },
          },
          // {
          //   resolve: 'gatsby-remark-prismjs',
          //   options: {
          //     classPrefix: 'language-',
          //     showLineNumbers: true,
          //     noInlineHighlight: false,
          //     aliases: {
          //       react: 'jsx',
          //       javascriptreact: 'jsx',
          //       'javascript react': 'jsx',
          //       typescriptreact: 'tsx',
          //       'typescript react': 'tsx',
          //     },
          //   },
          // },
          {
            resolve: 'gatsby-remark-images',
            options: {
              // maxWidth: 768,
              quality: 100,
              withWebp: true,
            },
          },
          {
            resolve: 'gatsby-remark-copy-linked-files',
            options: {},
          },
          {
            resolve: 'gatsby-remark-external-links',
            options: {
              target: '_blank',
              rel: 'nofollow',
            },
          },
          {
            resolve: `gatsby-remark-vscode`,
            options: {
              theme: 'Default Dark+', // Or install your favorite theme from GitHub
              extensions: ['rest-client'],
              injectStyles: true,
              inlineCode: {
                marker: '•',
              },
            },
          },

          {
            resolve: `gatsby-remark-katex`,
            options: {
              // Add any KaTeX options from https://github.com/KaTeX/KaTeX/blob/master/docs/options.md here
              strict: `ignore`,
            },
          },
          {
            resolve: 'gatsby-remark-external-links',
            options: {
              target: '_blank',
            },
          },
        ],
      },
    },
    {
      resolve: `gatsby-plugin-sharp`,
      options: {
        defaults: {
          formats: ['auto', 'webp'],
          quality: 100,
          placeholder: 'blurred',
        },
      },
    },
    {
      resolve: 'gatsby-plugin-robots-txt',
      options: {
        policy: [{ userAgent: '*', allow: '/' }],
      },
    },
    `gatsby-transformer-sharp`,
    `gatsby-plugin-image`,
    'gatsby-plugin-postcss',
    `gatsby-plugin-sass`,
    {
      resolve: `gatsby-plugin-manifest`,
      options: {
        name: title,
        short_name: title,
        description: description,
        lang: language,
        display: `standalone`,
        start_url: `/`,
        icon: `static/images/favicon.png`,
      },
    },
    {
      resolve: `gatsby-plugin-disqus`,
      options: {
        shortname: `hohshho`,
      },
    },
  ],
}
그냥 plugin문서 보고 구현하면 되는데 code highlight plugin을 고르는데 고민을 좀 해서
추가로 설명한다.
해당 기능을 위해서 3개 플러그인이 많이 쓰이는 것으로 확인했다.
3번이 기능이 제일 많은데 코드 라인 적용하는 기능이 없고
1번보단 2번이 관리해야 할 css가 적어서
gatsby-remark-vscode를 사용했다.
추가로 코드 타이틀을 표기하기 위해 gatsby-remark-code-headers
버튼 표기를 위해 gatsby-remark-code-buttons를 사용했다.
플러그인 추가 후 해당 class들의 css를 추가하면 커스텀 가능하다
(이작업은 추후 진행 예정… ㅜㅜ)
해당 라이브러리들을 적용하면 codehighlighlight는 다음과 같이 사용한다.
 ``` {numberLines}
// header.js

...

 ```
5. 구현 후기
생각보다 CSS 작업이 많아서 힘들었고, 작업량이 많아서 시간 여유 있을 때 주말에 날잡고
나머지 완성해야 겠다 😭😭😭😭
기능 구현하는 부분은 plugin을 적극 사용해서 크게 어려움이 없어서 다행이었음 ㅎㅎ
컴포넌트 구현할 때 MUI를 사용해보고 싶었는데 Blog 구현하면서 찍먹 해볼 수 있어서 좋았다
시간 많이 투자 해서 제작 했으니 열공하고, 블로그 포스팅 많이 하자 🙏
Tip
- gatsby-node.js를 디버깅 할 떄
- 라이브러리 작업을 하다보면 config설정이 바뀌거나 할 때 gatsby clean으로 .cache를 비워줘야 한다.
- sort 쿼리 양식
query SearchIndexQuery {
  allMarkdownRemark(
    sort: [{ frontmatter: { date: DESC } }, { frontmatter: { title: DESC } }]
  ) {
    edges {
      node {
        frontmatter {
          title
          category
        }
        fields {
          slug
        }
      }
    }
  }
}
Reference
React기반 Gatsby로 기술블로그 개발하기
웹 컴포넌트 스타일링 관리 : CSS-in-JS vs CSS-in-CSS - SAMSUNG SDS
Clean URL - wikipedia