


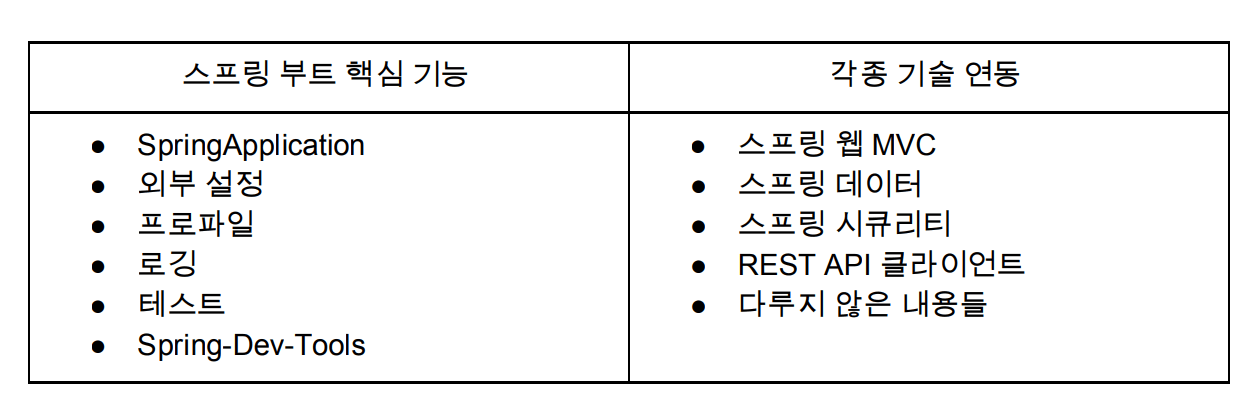
스프링 부트 개념과 활용 - 백기선
스프링 부트는 제품 수준의 독립적인 어플리케이션을 만들 수 있게 도와준다.
스프링 부트의 컨벤션을 기본적으로 제공한다.
스프링 프레임워크 서드파티 라이브러리에 대한 지원도 해준다. (ex - tomcat)
but 요구사항에 맞게 쉽고 빠르게 변경이 가능하다.
스프링 부트 원리
의존성 관리 이해
스프링 부트를 사용하다보면 pom.xml에 버전을 명시하지 않는다.
그런데 적절한 버전을 적용해준다.
비밀은 아래에 작성한 코드 때문이다.
    <parent>
        <groupId>org.springframework.boot</groupId>
        <artifactId>spring-boot-starter-parent</artifactId>
        <version>3.4.1</version>
        <relativePath/> <!-- lookup parent from repository -->
    </parent>
spring-boot-starter-parent에 들어가보면 버전을 명시해주는 부분이 있는데
디펜전시에 정의되어있는 하나라도 쓰게되면 거기서 관리해주는 버전을 사용한다.
스프링부트의 의존성 관리기능을 사용하면 좋은 이유는
직접 관리해야 하는 의존성의 수가 줄어든다. stater위주로 의존성을 추가하면 된다.
특별히 사용해야 하는 버전이 있으면 해당 버전을 명시한다.
parent방법이 더 많은 디펜전시들을 기본 세팅해준다.
의존성 관리 응용
SpringBoot가 관리해주지 않는 디펜전시는 버전을 명시해줘야 한다.
항상 버전을 명시해주는게 좋다. (Spring-boot-starter는 내부에서 명시해주니 제외)
SpringBoot가 관리해주는 버전은 변경하고 싶으면
    <properties>
        <java.version>17</java.version>
        <spring.version>5.0.6.RELEASE</spring.version>
    </properties>
자동 설정 이해
@EnableAutoConfiguration
- @SpringBootConfiguration
- @ComponentScan
- @EnableAutoconfiguration
스프링은 빈을 등록하는 단계가 2단계 @ComponentScan, @EnableAutoconfiguration이다.
@ComponentScan은 말 그대로 @Component라는 애노테이션을 가진 클래스를 스캔해서 빈으로 등록
- @Configuration @Repository @Service @Controller @RestController
@EnableAutoConfiguration
자바 리소스의 메타디렉토리 안에 spring.factories라는 파일이 있다.
안에 SpringBoot가 기본적으로 등록해주는 것들이 들어있다. (조건에 따라 등록하기도 하고, 안등록하기도 한다.)
- spring.factories
- org.springframework.boot.autoconfigure.EnableAutoConfiguration
- @Configuration
- @ConditionalOnXxxYyyZzz
내장 웹서버 이해
-
스프링 부트는 서버가 아니다.
- 톰캣 객체 생성
- 포트 설정
- 톰캣에 컨텍스트 추가
- 서블릿 만들기
- 톰캣에 서블릿 추가
- 컨텍스트에 서블릿 맵핑
- 톰캣 실행 및 대기
-
이 모든 과정을 보다 상세히 또 유연하고 설정하고 실행해주는게 바로 스프링 부트의 자동 설정
독립적으로 실행 가능한 JAR
mvn package를 하면 실행 가능한 JAR 파일 “하나가” 생성 된다.
-> spring-maven-plugin이 해주는 일 (패키징)
스프링 부트의 전략
- 내장 JAR : 기본적으로 자바에는 내장 JAR를 로딩하는 표준적인 방법이 없음.
- 애플리케이션 클래스와 라이브러리 위치 구분
- org.springframework.boot.loader.jar.JarFile을 사용해서 내장 JAR를 읽는다.
- org.springframework.boot.loader.Launcher를 사용해서 실행한다.
스프링 부트 활용
스프링 설정
여태까지는
SpringApplication.run(SpringinitApplicaction.class, args);로 사용했다. 이렇게 사용하면 스프링에서 제공하는 커스텀마인즈 기능을 활용하기 힘들어서
인스턴스를 만들어서 런시켜 실행한다.
@SpringBootApplication
public class SpringinitApplication {
    public stati void main(String[] args){
        SpringApplication app = new SpringAppliation(SpringinitApplication.class);
        app.run(args);
    }
}
아무런 옵션을 주지 않으면 log는 info레벨로 어플리케이션이 동작한다.
debug레벨로 실행할 경우 어떠한 자동설정이 되고, 어떠한 부분이 자동설정이 되지 않는지 확인이 가능하다.
ApplicationEvent 등록
- ApplicationContext를 만들기 전에 사용하는 리스너는 @Bean으로 등록할 수 없다.
- SpringApplication.addListners() 로 리스너 등록하면 사용된다.
- 애플리케이션 아규먼트 사용하기
- ApplicationArguments를 빈으로 등록해 주니까 가져다 쓰면 된다.
- 애플리케이션 실행한 뒤 뭔가 실행하고 싶을 때
- ApplicationRunner (추천) 또는 CommandLineRunner
- 순서 지정 가능 @Order
java -jar target/springinit-0.0.1-SNAPSHOT.jar -Dfoo --bar-D옵션은 JVM옵션, –는 아규먼트
외부 설정
사용할 수 있는 외부 설정
- properties
- 스프링 부트가 어플리케이션을 구동할 떄 자동으로 로딩하는 파일 이름, 규약, 컨벤션
- @Value어노테이션으로 사용이 가능
- YAML
- 환경 변수
- 커맨드 라인 아규먼트
프로퍼티 우선 순위
- 유저 홈 디렉토리에 있는 spring-boot-dev-tools.properties
- 테스트에 있는 @TestPropertySource
- @SpringBootTest 애노테이션의 properties 애트리뷰트
- 커맨드 라인 아규먼트
- SPRING_APPLICATION_JSON (환경 변수 또는 시스템 프로티) 에 들어있는 프로퍼티
- ServletConfig 파라미터
- ServletContext 파라미터
- java:comp/env JNDI 애트리뷰트
- System.getProperties() 자바 시스템 프로퍼티
- OS 환경 변수
- RandomValuePropertySource
- JAR 밖에 있는 특정 프로파일용 application properties
- JAR 안에 있는 특정 프로파일용 application properties
- JAR 밖에 있는 application properties
- JAR 안에 있는 application properties
- @PropertySource
- 기본 프로퍼티 (SpringApplication.setDefaultProperties)
application.properties 파일 위치 우선 순위 (높은게 낮은걸 덮어 쓴다)
- file:./config/
- file:./
- classpath:/config/
- classpath:/
프로파일
SpringBoot는 application.properties에 아래와 같이 활성화 할 프로파일을 명시하고 사용 가능하다.
spring.profiles.active=prod프로파일용 프로퍼티
- application-{profile}.properties
로깅
로깅 퍼사드 VS 로거
- Commons Logging, SLF4j
- 실제 로깅을 하는게 아니라 로거 api를 추상화한 인터페이스
- 로깅퍼사드의 장점은 로거를 바꿔낄 수 있다.
- JUL, Log4J2, Logback
커스텀 로그 설정 파일 사용하기
- Logback: logback-spring.xml
- Log4J2: log4j2-spring.xml
테스트
@SpringBootTest
- @RunWith(SpringRunner.class)랑 같이 써야 함
@Runwith(SpringRunner.class)
@SpringBootTest(webEnvironment = SpringBootTest.WebEnvironment.MOCK)
@AutoConfigureMockMvc
public class SampleControllerTest {

    @Autowired
    MockMvc mockMvc;

    @Test
    public void hello() throws Exception{
        mockMvc.perform(get("hello"))
                .andExpect(status().isOk())
                .andExpect(content().string("hello"))
                .andDo(print())
    }
}
@SpringBootTest(webEnvironment = SpringBootTest.WebEnvironment.MOCK)
- 서블릿을 Mocking한 것을 띄운다.
- DispatcherServlet 이 만들어지긴 하는데 Mockup에서 DispatcherServlet에다가 요청을 보내는 것과 비스무리하게 실행할 수 있는데, MockMvc라는 클라이언트를 사용한다.
- 추가로 어떤 Controller를 사용했냐, 어떤 Controller의 method를 호출했냐
@Runwith(SpringRunner.class)
@SpringBootTest(webEnvironment = SpringBootTest.WebEnvironment.RANDOM_PORT)
@AutoConfigureMockMvc
public class SampleControllerTest {

    @Autowired
    TestRestTemplate testRestTemplate;

    @MockBean
    SampleService mockSampleService;

    @Test
    public void hello() throws Exception{
        whwn(mockSampleService.getName()).thenReturn("Hello");

        testRestTemplate.getForObject("/hello", String.class);
        assertThat(result).isEqulTo("hello");
    }
}
RANDOM_PORT를 사용하면 실제로 Spring내장 톰캣이 뜬다.
이떄부턴 RestTemplate이나 test용 webclient를 사용해야한다.
@MockBean
- ApplicationContext에 들어있는 빈을 Mock으로 만든 객체로 교체 함.
- 모든 @Test 마다 자동으로 리셋.
모든 빈이 필요없고 내가 테스트하고 싶은 빈만 등록해 테스트하고 싶다.
@Runwith(SpringRunner.class)
@WebMvcTest(SampleController.class)
public class SampleControllerTest {

    @MockBean
    SampleService mockSampleService;

    @Autowired
    MockMvc mockMvc;

    @Test
    public void hello() throws Exception{
        whwn(mockSampleService.getName()).thenReturn("Hello");

        mockMvc.perform(get("/"))
                .andExcept(content().string("hello"));

        // 로그를 테스트 가능하다.
        assertThat(outputCapture.toString())
                .contains("holoman")
                .contains("skip");
    }
}
슬라이스 테스트
- 레이어 별로 잘라서 테스트하고 싶을 때
- @JsonTest
- @WebMvcTest
- @WebFluxTest
- @DataJpaTest
레이어 별로 짤라서 테스트가 가능하다.
@WebMvcTest controller하나만 테스트한다. 슬라이싱, 웹과 관련된 애들만 빈으로 등록된다.
SpringBootDevtools
pom.xml에 추가해줘야 한다.
캐시 설정을 개발 환경에 맞게 변경.
- 클래스패스에 있는 파일이 변경 될 때마다 자동으로 재시작.
웹 MVC
SpringBoot를 사용하면 아무 설정없이 MVC기능을 사용할 수 있는데 이는 SpringBoot의 자동설정 덕분이다.
HttpMessageConverters
HTTP 요청 본문을 개게로 변경하거나, 객체를 HTTP 응답 본문으로 변경할 때 사용
- @RequestBody
- @ResponseBody
@RestController일 경우 명시하지 않아도 return타입에 @ResponseBody가 붙는다.
@Controller일 경우 @ResponseBody를 꼭 붙여줘야 한다
ViewResolver
뷰 리졸버 설정 제공
- accept header에 따라 응답이 달라진다.
XML메시지 컨버터
<dependency>
    <groupId>com.fasterxml.jackson.dataformat</groupId>
    <artifactId>jackson-dataformat-xml</artifactId>
    <version>2.9.6</version>
</dependency>
정적 리소스 지원
정적 리소스 맵핑 “/**”
- 기본 리소스 위치
- classpath:/static
- classpath:/public
- classpath:/resources/
- classpath:/META-INF/resources
- 예) “/hello.html” => /static/hello.html
- spring.mvc.static-path-pattern: 맵핑 설정 변경 가능
- spring.mvc.static-locations: 리소스 찾을 위치 변경 가능
- Last-Modified 헤더를 보고 304 응답을 보냄.
- 코드를 수정한 경우 Request Header에 보면 if-modefied-since이 바뀜
- ResourceHttpRequestHandler가 처리함.
- WebMvcConfigurer의 addRersourceHandlers로 커스터마이징 할 수 있음
아래와 같이 매핑 정보를 추가할 수 있다.
@Override
public void addResourceHandlers(ResourceHandlerRegistry registry) {
    registry.addResourceHandler("/m/**")
        .addResourceLocations("classpath:/m/")
        .setCachePeriod(20);
}
Thymeleaf
스프링 부트가 자동 설정을 지원하는 템플릿 엔진
HtmlUnit
HTML 템플릿 뷰 테스트를 보다 전문적으로 할 수 있는 방법
필요 시 아래 document참고
의존성 추가
<dependency>
    <groupId>org.seleniumhq.selenium</groupId>
    <artifactId>htmlunit-driver</artifactId>
    <scope>test</scope>
</dependency>
<dependency>
    <groupId>net.sourceforge.htmlunit</groupId>
    <artifactId>htmlunit</artifactId>
    <scope>test</scope>
</dependency>
ExceptionHandler
스프링 @MVC 예외 처리 방법
- @ExchangepHandler
스프링 부트가 제공하는 기본 예외 처리기
- BasicErrorController
- HTML과 JSON 응답 지원
- 커스터마이징 방법
- ErrorController 구현
CORS
스프링 부트는 cors설정을 자동으로 해준다. (@CrossOrigin)
아래 예제는 8080포트에서 18080포트가 내 리소스를 가져갈 수 있게 허용
@CrossOrigin(origins = "http://localhost:18080")
@RestController
메소드나 클래스에 붙여서 사용
webConfig에서 설정도 가능
@Configuration
public class WebConfig implements WebMvcConfigurer {

    @Override
    public void addCorsMappings(corRegistry registry){
        registry.addMapping("/**")
                .allowedOrigins("http://localhost:18080")
    }
}
스프링 데이터
스프링부트가 지원하는 인메모리 데이터베이스 -> H2
JPA를 테스트 할 땐 -> @DataJpaTest (슬라이스 테스트) 작성
REST Client
SpringFramework에서 REST Client를 제공하고 스프링 부트는 REST Client를 쉽게 사용할 수 있도록 빈을 주입시켜준다.
주의할 것은 RestClient나 WebClient를 주입해주는게 아니라 REST Template Builder, WebClient.Builder를 빈으로 등록해준다.
RestTemplate
- Blocking I/O 기반의 Synchronous API
- RestTemplateAutoConfiguration
- 프로젝트에 spring-web 모듈이 있다면 RestTemplateBuilder를 빈으로 등록해 준다.
- https://docs.spring.io/spring/docs/current/spring-framework-reference/integration.html#rest-client-access
WebClient
- Non-Blocking I/O 기반의 Asynchronous API
- WebClientAutoConfiguration
- 프로젝트에 spring-webflux 모듈이 있다면 WebClient.Builder를 빈으로 등록해 준다.
- https://docs.spring.io/spring/docs/current/spring-framework-reference/web-reactive.html#webflux-client
스프링 부트 운영
스프링 부트는 애플리케이션 운영 활경에서 유용한 기능 제공
스프링 부트가 제공하는 엔드포인트와 메트릭스 그 데이터를 활용하는 모니터링 기능에 대해 학습
Spring Boot Actuator
스프링 부트는 actuator라는 모니터링 도구를 제공
actuator라는 이 모듈을 사용하면 여러 유용한 기능 제공 -> Endpoint라는 것을 통해 제공
의존성 추가
- spring-boot-starter-actuator
애플리케이션의 각종 정보를 확인할 수 있는 Endpoints
- 다양한 Endpoints 제공.
- JMX 또는 HTTP를 통해 접근 가능 함.
- shutdown을 제외한 모든 Endpoint는 기본적으로 활성화 상태.
- 활성화 옵션 조정
- management.endpoints.enabled-by-default=false
- management.endpoint.info.enabled=true
EndPoint는 SpringSecurity사용해서 접속 불가능하게 막아야 함
SpringBoot Admin
스프링 부트 Actuator UI 제공
아래의 서버를 하나 만들어 줘야함
어드민 서버 설정
<dependency>
  <groupId>de.codecentric</groupId>
  <artifactId>spring-boot-admin-starter-server</artifactId>
  <version>2.0.1</version>
</dependency>
클라이언트 설정
<dependency>
  <groupId>de.codecentric</groupId>
  <artifactId>spring-boot-admin-starter-client</artifactId>
  <version>2.0.1</version>
</dependency>

# Admin서버 주소
spring.boot.admin.client.url=http://localhost:8080
management.endpoints.web.exposure.include=*